How to deliver project files to a client
A clear handoff gives your client the right files, useful instructions, and one place to find them. Here’s how to put it together in Filedeck.
Before you start
The Free plan includes 1 GB temporary storage, 3 active rooms, and files up to 250 MB each. Password protection and custom expiry controls are available on paid plans. Keep your own copy of every deliverable. Compare plans.
1. Prepare the final files
Gather the files for one project and check them before uploading. Give them names that make sense to someone who hasn’t seen your working folders. For a design handoff, that might be brand-guidelines.pdf, logo-final.png, and a short readme explaining how to use them.
Remove draft versions and anything the client should not receive. Open the final exports yourself, make sure they are the intended versions, and keep a separate backup. Decide what response you need: a download confirmation, feedback, or explicit approval.
2. Create a delivery room
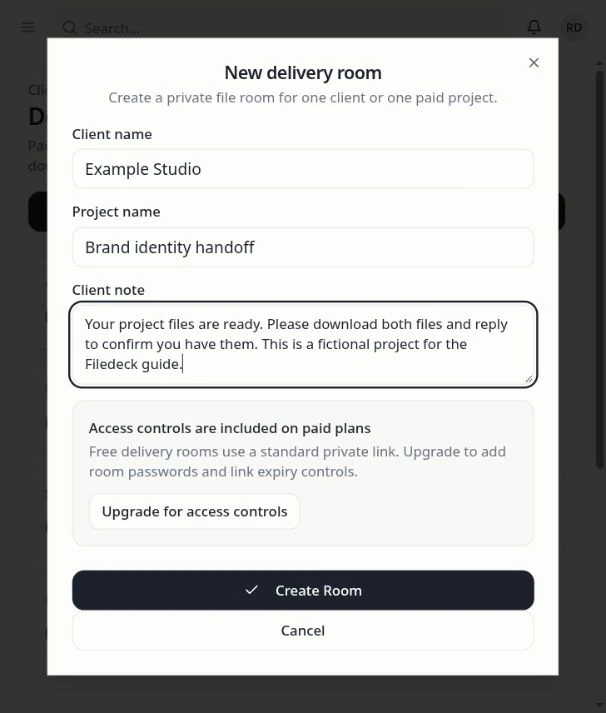
Create a Filedeck account or sign in, open Rooms, and select New Room. Enter the Client name and Project name. Use Client note to explain what’s included and what the client should do next.
For example: “The final logo and brand guidelines are ready. Please download both files and reply with any questions by Friday.” Set an Expiry date and an optional Password if you’re on a paid plan, then select Create Room. Choose these settings before creating the room.
3. Add the project files
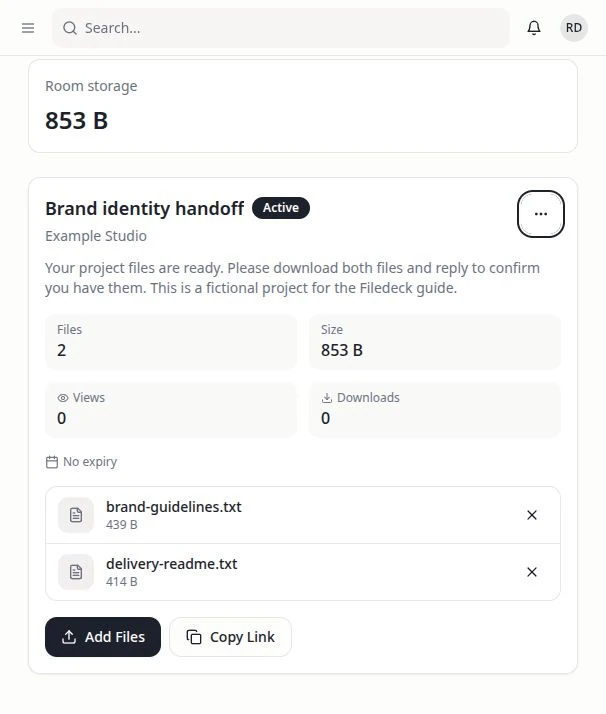
On the room card, select Add Files. If the files are already in Filedeck, use the My Files tab. Search, select the files you want, and use the add button to attach your selection. This reuses the existing uploads.
To upload from your device, switch to Upload new, then drag files into the upload area or click to browse. The current picker accepts images, PDF, Word, TXT, MP4, and MP3 files. Wait for the upload to finish, then check the public room in the next step to confirm every intended file is included.
4. Check the client’s view
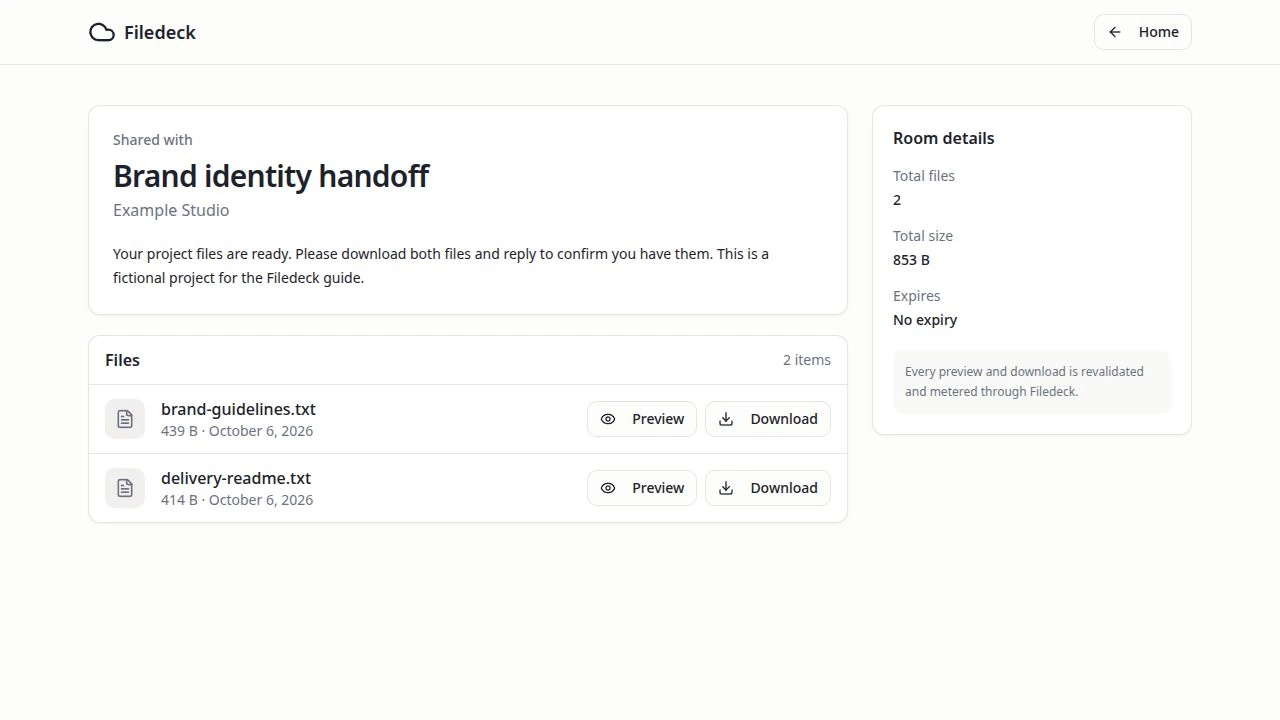
Open the room’s Room actions menu and choose Open public room. Check the project name, client note, file names, and file sizes. If you set a password, enter it and select Unlock Room.
Clients can open the room link without creating their own Filedeck account. They can select Preview or Download beside a file. Your own visits and previews can also contribute to the room’s activity counts, so check the client view before using those counts for follow-up.
6. Follow up and close access when ready
Reopen or refresh Delivery Rooms to check Views, Downloads, and Last viewed. These signals can help you decide when to follow up. They don’t identify every recipient, prove a transfer completed, or confirm that the client reviewed or approved the work. Ask for that confirmation in your client conversation.
When the handoff is complete, choose Pause room in Room actions to stop access through that room link. Use Activate room if you need to reopen it. Pausing a room does not remove copies someone has already downloaded or disable other links you created for those files.
Free storage and rooms are intended for temporary delivery. Don’t promise indefinite access to a Free room; arrange longer-term access when needed and keep your own original files. See the current storage plans.
Your checklist before sending
- Only the intended final files are attached.
- File names and exports are clear and correct.
- The client note explains what to do next.
- You checked the recipient view and any password or expiry settings.
- You have a separate copy of the deliverables.
Ready for your next client delivery?
Start with a Free account and put one project’s files and instructions in a delivery room.
Get Filedeck freeHave a question? Contact the Filedeck team.